
Reversing camera installation guide
Yellowing Resistance Test Chamber A yellowing resistance test chamber is a specialized piece of equipment used to evaluate the yellowing resistance of materials. It is commonly used in industries such as automotive, aerospace, and construction to assess the long-term color stability of materials exposed to various environmental conditions. Yellowing Resistance Experiment,Yellowing Resistance Test Chamber,Yellowing resistance aging test chamber Dongguan Best Instrument Technology Co., Ltd , https://www.best-tester.com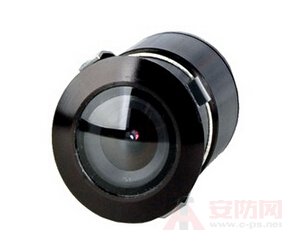
The second step determines the installation position of the car camera. Generally divided into two types:
One type is mounted on the position of the license plate light. This kind of installation is relatively easy. Just fix the camera to the position of the license plate light with the small screws provided in the camera accessories. Adjust the iron or gasket in the accessories to achieve the best reversing angle of the camera.
The line of the camera penetrates into the car through the gap of the license plate lamp, and is connected with the backup lamp power supply and the video extension cable. This type of reversing camera is a popular one, with a more subtle appearance and easier installation.
The other is a drilled installation that fits inside the bumper. The advantage of this method is that there is no need to drill holes in the metal parts behind the car. Because the bumper is a plastic piece, the camera is also relatively easy to route.
The third step is to connect the power cable of the camera to the power cable of the rear backup lamp.
Then connect the video cable of the camera to the video extension cable, and connect the other end of the video extension cable to the AV input of the car display.
Finally, restore the battery power supply, start the car, hang up the reverse gear, you can see the reverse image on the car display.
Reversing camera notes:
1, can not completely rely on the reverse rear view system to reverse, but can only be regarded as an auxiliary tool for reversing.
2. The car display must be properly connected. If the display does not provide an AV input interface, you must find the corresponding video cable or add a video switching device so that the rear view is displayed as normal.
3, do not easily connect the car electrical power directly to the car battery power supply, so as not to cause power instability.
The test chamber simulates accelerated aging conditions by subjecting the material to controlled levels of heat, humidity, and UV radiation. These factors can cause materials to undergo yellowing or discoloration over time, which can negatively impact their aesthetic appeal and performance.
During the test, samples of the material are placed inside the chamber, and the temperature, humidity, and UV exposure levels are adjusted according to the desired testing parameters. The samples are typically monitored over a specified period, and any changes in color or yellowing are visually assessed.
The yellowing resistance test chamber helps manufacturers determine the durability and color stability of materials, allowing them to make informed decisions regarding product development and quality control. It can also be used to compare the yellowing resistance of different materials or evaluate the effectiveness of protective coatings or additives in preventing yellowing.
Overall, the yellowing resistance test chamber is an essential tool for industries that rely on materials with long-lasting color stability, ensuring that products maintain their desired appearance even after prolonged exposure to harsh environmental conditions.